Image Masks
An image mask controls which parts of a layer appear. Apply one to an image, video, or group layer. The mask fits the layer's local bounds and follows its position, size, and rotation. A group mask fits the current bounds of its content.
Add an image mask
- Upload a mask image through the Library, or select an image already in the Library. A PNG with transparency works well for a soft edge.
- Select the target image, video, or group in Layers. Select the layer itself, rather than an animation.
- Stop playback and move the playhead to the start.
- Find Image Mask in the right properties panel. Scroll down if needed.
- Choose the image under Mask image. If you used Upload image in this panel, select the new image after its upload finishes.
- Choose Transparency (alpha) or Brightness (luminance) under Interpretation.
- Select Enable mask. Select Invert mask if you want to show the opposite area.
- Preview the result, then save your theme.

Compare the result
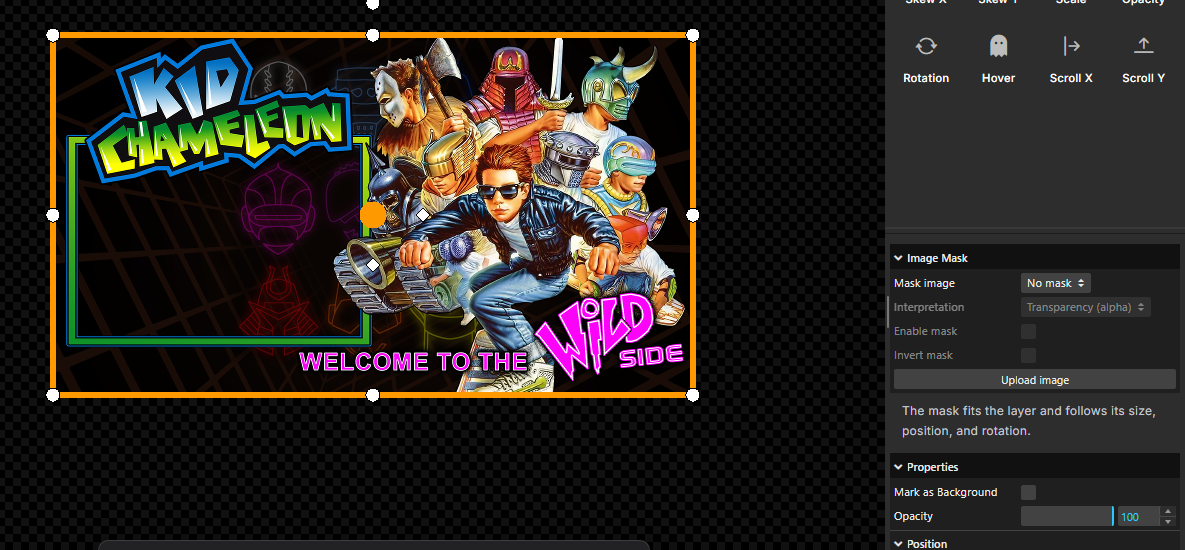
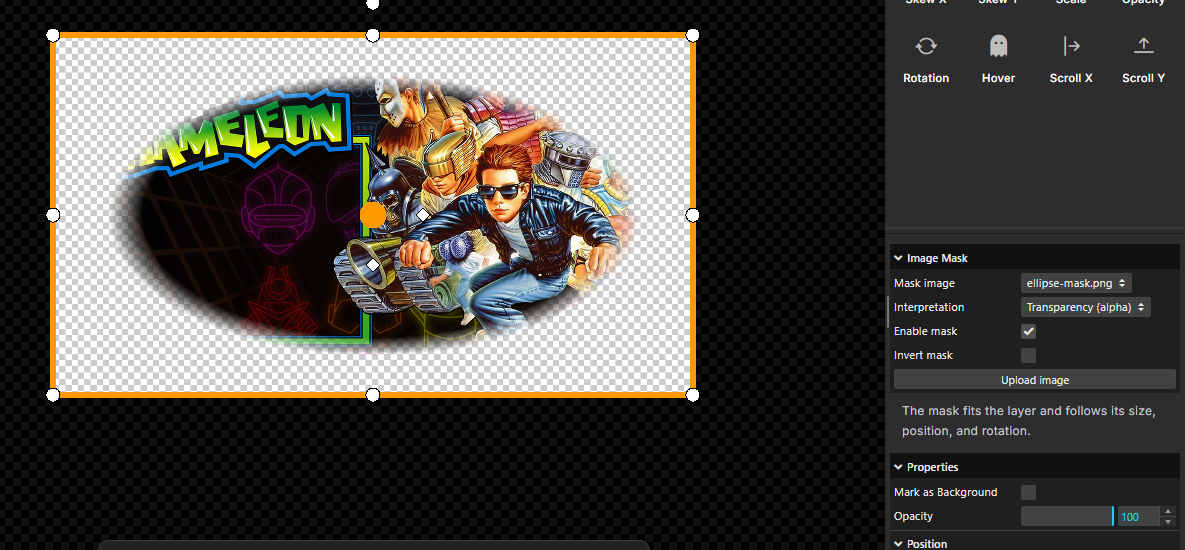
These Builder screenshots use a Kid Chameleon theme exported from a PSD. The first shows the full image. The second applies a transparent ellipse mask, leaving the center visible with a soft edge. The selected layer's white handles and orange border belong to the editor.
Before
After
Select either screenshot to open the full-resolution image. Download the sample theme image and ellipse mask to try the same reveal.
Choose the interpretation
| Setting | Result |
|---|---|
| Transparency (alpha) | Opaque parts of the mask show the layer. Transparent parts hide it. Partly transparent pixels create a soft edge. |
| Brightness (luminance) | White shows the layer, black hides it, and gray creates partial visibility. Transparency also reduces visibility. |
| Invert mask | Reverses the visible and hidden areas for either interpretation. |
The mask fills the target's current bounds. Move, scale, or rotate the target to move the reveal with it. A group needs content before HyperTheme has bounds to fit its mask. Existing rectangular Group Clipping still limits the visible area when both settings are enabled.
To remove the mask, choose No mask. To keep the image choice while showing the full layer, clear Enable mask. If the selected mask image becomes unavailable, upload it again through the Library or choose another image.
For layer selection and groups, see Working with Layers. For uploads, see Assets & Library.