Motion Paths
Move an image, video, or group along a route you draw in ThemeBuilder. Start with a straight line, then bend the line with curve handles. Add more segments when you need a longer route or a closed loop.
Availability: this guide covers the upcoming Motion Path update in HyperTheme #599 and the shared player #107. Screenshots show the feature build with a sample arrow. The canvas is zoomed in for editing.
The screenshots use Settings > Handle Opacity > 10% to keep the layer's transform handles faint. The colored route guides stay visible.
Motion preview
Open the demo to watch straight-line playback, both handles bending the line, and curved playback. Each trip takes four seconds. Loop and Yoyo send the arrow back along the same route. Close the demo to hide the animation.
Show animated demo
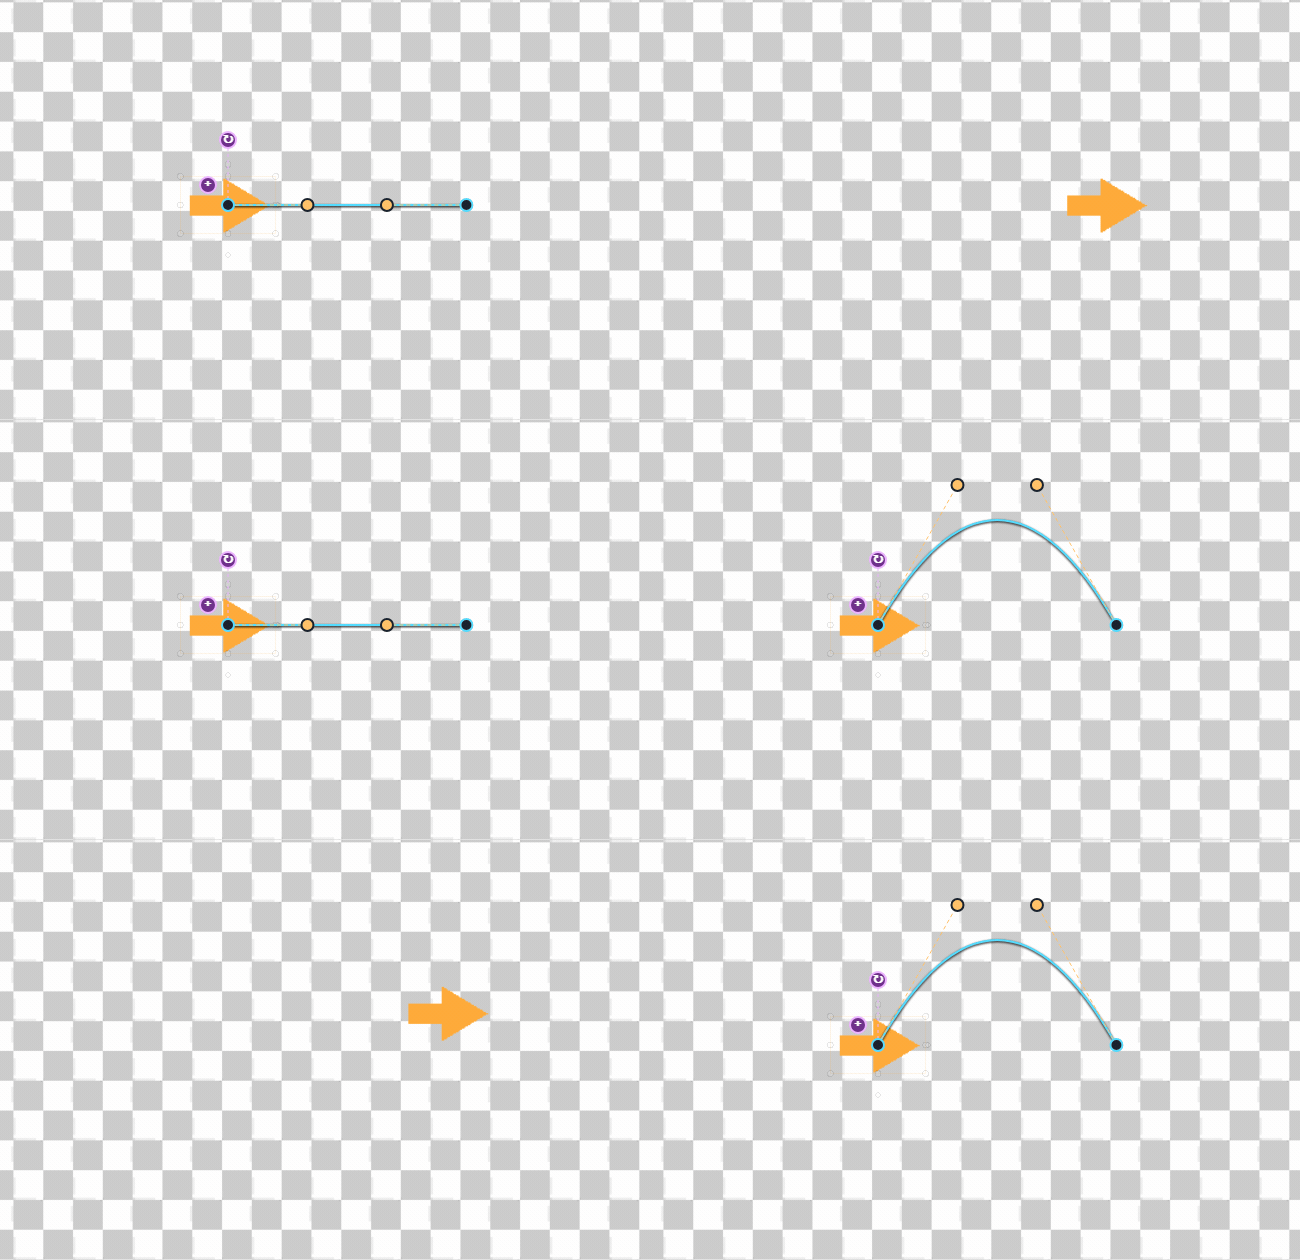
1. Add Motion Path to a layer
- Open your theme in ThemeBuilder.
- Add artwork through the asset library, or select an existing image or video.
- Select the layer in the Layers tab. For several pieces of artwork moving together, select their group.
- In the animation browser on the right, double-click Motion Path.
- Click the Motion Path bar in the timeline to open its controls.
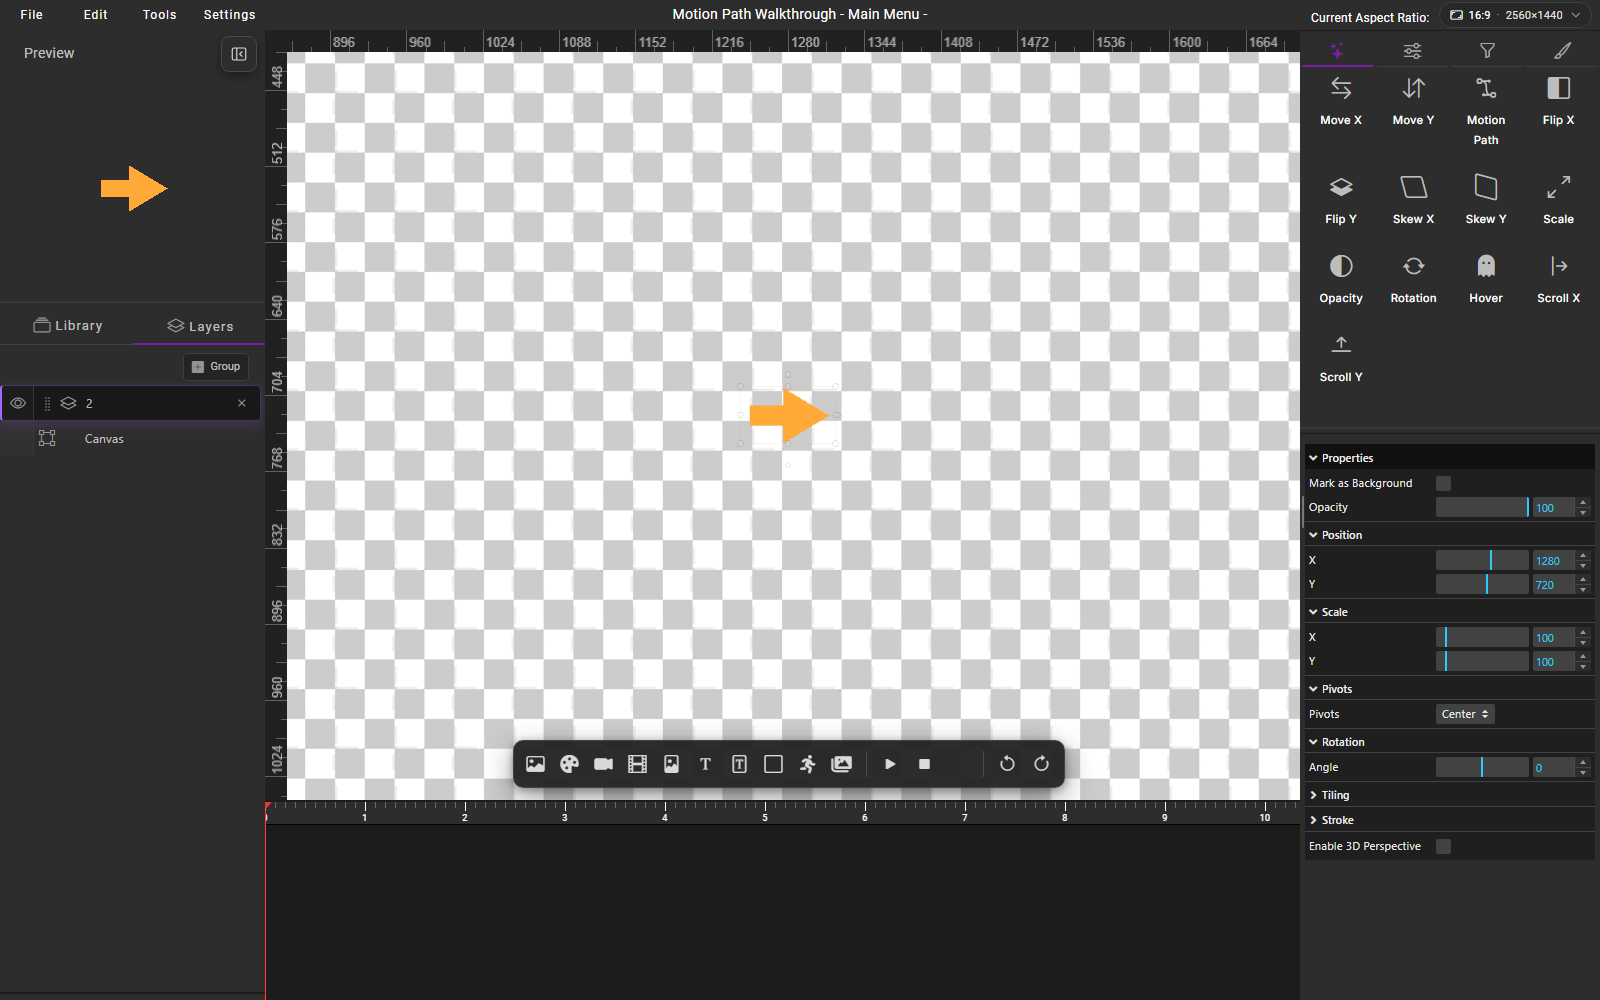
Each layer supports one Motion Path. Extend the route with segments when you need more curves.
2. Start with a straight line
New Motion Paths start as a straight line. Choose Line preset in the Motion Path panel to reset an existing route to this starting shape.
The line has a start point, an end point, and two orange curve handles. Keep the handles on the line for straight movement. Drag the handles away from the line to make a curve.
A preset replaces the current route. Use Edit > Undo to restore a previous shape.
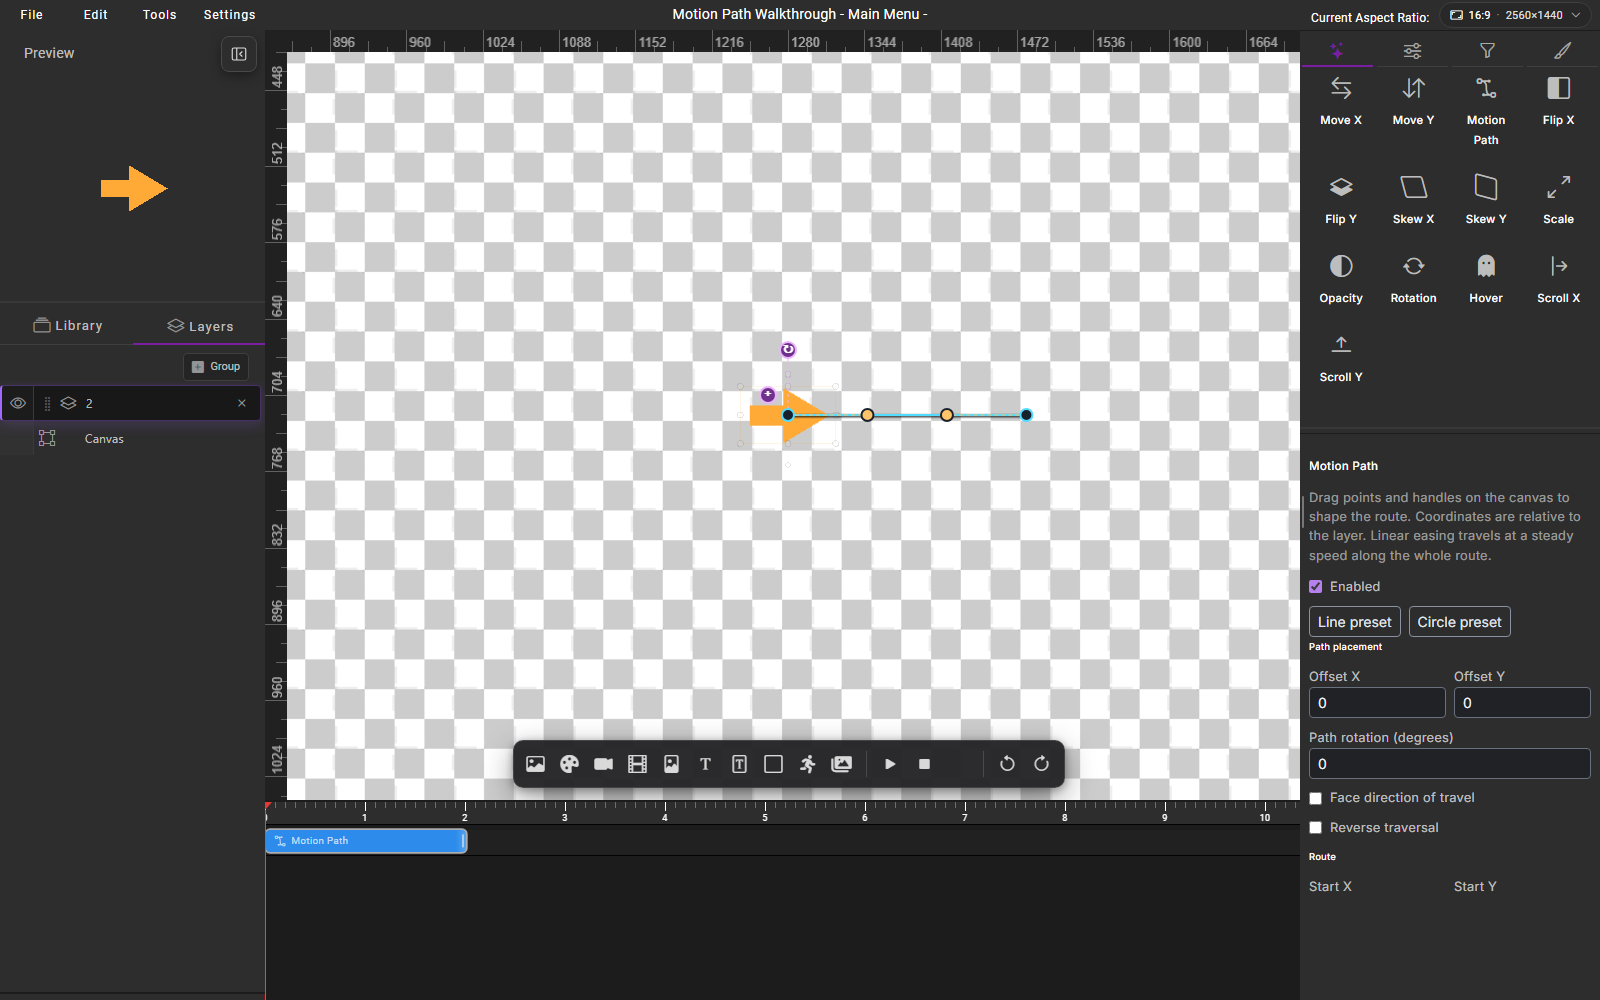
Use Tools > Zoom In for close editing. Use Tools > Fit to Screen to review the whole theme. Zoom changes your view without changing the saved route coordinates.
3. Shape the route
Pause or stop preview, then select the Motion Path timeline bar. Drag the guides on the canvas:
| Guide | Action | Result |
|---|---|---|
| Blue outlined point | Drag a start or end point | Moves an anchor on the route |
| Orange handle | Drag away from an anchor | Changes the curve entering or leaving the anchor |
| Purple + handle | Drag | Moves the entire route relative to the layer |
| Purple rotation handle | Drag around the route origin | Rotates the entire route |
- Drag the first orange handle upward to bend the line away from its start.
- Drag the second orange handle upward to round the approach to the endpoint.
- Leave the blue start and end points in place to keep the same departure and arrival positions.
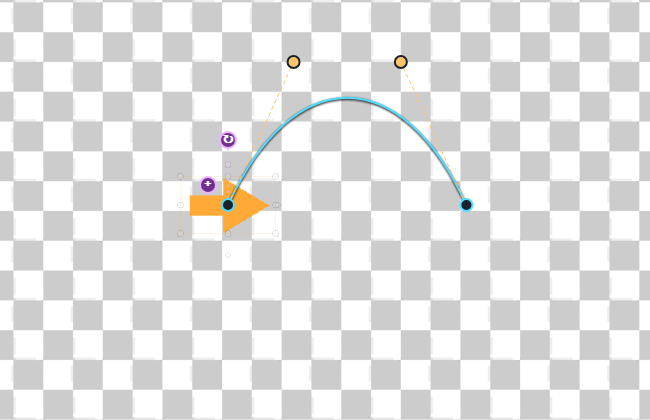
For a smooth join, align the incoming and outgoing handles across the shared anchor. Bend the handles in different directions for a sharper turn. On a closed route, the joined start and end move together with their adjacent handles.
Enter precise coordinates
Scroll down in the Motion Path panel. Expand a Segment to edit its points.
| Field | Meaning |
|---|---|
| Start X / Start Y | Where the first segment begins |
| Outgoing handle X / Y | Controls the curve leaving the segment's start |
| Incoming handle X / Y | Controls the curve approaching the segment's end |
| End point X / Y | Where the segment ends and the next begins |
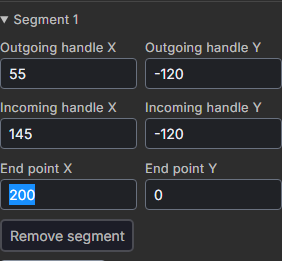
Coordinates describe positions within the route. Handle values are coordinates, rather than distances from an anchor. Positive X goes right; positive Y goes down.
Select Add segment to extend the route. Use Remove segment inside an expanded segment to shorten the route. Keep at least one segment.
Make a closed loop when needed
- Start with your line or curve and select Add segment to extend the route.
- Move the new endpoints around the loop and bend each segment with its orange handles.
- Set the final End point X/Y to the same values as Start X/Y to close the loop.
- Align the handles at the closing join for a smooth turn.
For a circular route, Circle preset provides a shortcut with four connected curves. The preset replaces your current route. Continue dragging its points and handles to reshape the circle.
Place and turn the whole route
Use Offset X and Offset Y under Path placement to shift the route. Use Path rotation (degrees) to rotate the route around its origin. These controls preserve the individual point coordinates.
The route is relative to the layer's position in its parent. Moving the layer carries the route along. A start of X 0, Y 0 with zero offsets begins at the layer's placed position. A nonzero start adds a displacement from this position.
Enable Face direction of travel to turn the artwork along the curve. Leave this unchecked to preserve the artwork's own orientation. Path rotation changes the route; Face direction of travel changes the artwork's facing. Existing layer rotation still contributes to the result.
Enable Reverse traversal to travel from the end toward the start.
4. Set timing and preview
Scroll to Timing in the Motion Path panel.
| Control | Effect |
|---|---|
| Duration (seconds) | Time for one trip along the complete route |
| Delay (seconds) | Wait before the first trip |
| Loop delay (seconds) | Wait between repeats |
| Loop | Repeat the route |
| Yoyo | Alternate forward and backward trips when repeating |
| Easing | Change how speed varies during the trip |
For this open route, start with Duration 4, Delay 0, Loop delay 0, Loop enabled, Yoyo enabled, and Linear easing. The artwork travels along the curve, then returns along the same curve.
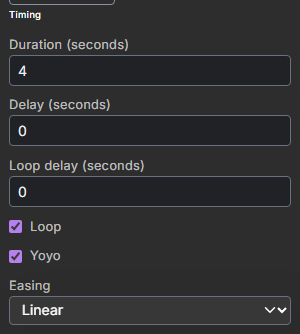
Linear easing gives approximately steady speed over the complete route, including segments with different lengths. Other easing choices accelerate, decelerate, or reverse progress. Easing overshoot stops at the route endpoints.
- Press Play in the bottom toolbar.
- Watch one full trip and the repeat boundary.
- Press Pause to hold the current frame.
- Drag the timeline playhead to inspect a specific moment.
- Press Play to resume, or Stop to return to the beginning.
The route guides disappear during playback and stay out of exported artwork. Use a closed route for a continuous loop. An open route returns to its start on each repeat; use Yoyo with Loop for a return trip along the same route.
5. Combine movement
A line or curve plus Move X shifts the whole route horizontally while the artwork follows the route. Move Y adds vertical travel. Each animation keeps its own duration, delay, and easing.
- Select the same layer.
- Double-click Move X in the animation browser.
- Click the Move X timeline bar. Set Start to the layer's placed X position and End to 300 units farther right. For the sample at X 1280, use Start 1280 and End 1580.
- Click Motion Path, keep the curve from step 3, and set a four-second duration with Loop and Yoyo enabled.
- Select Move X again and set Speed to 8. This field sets the duration in seconds, giving one forward trip and one return trip during the eight-second horizontal movement.
- Preview both animations together.
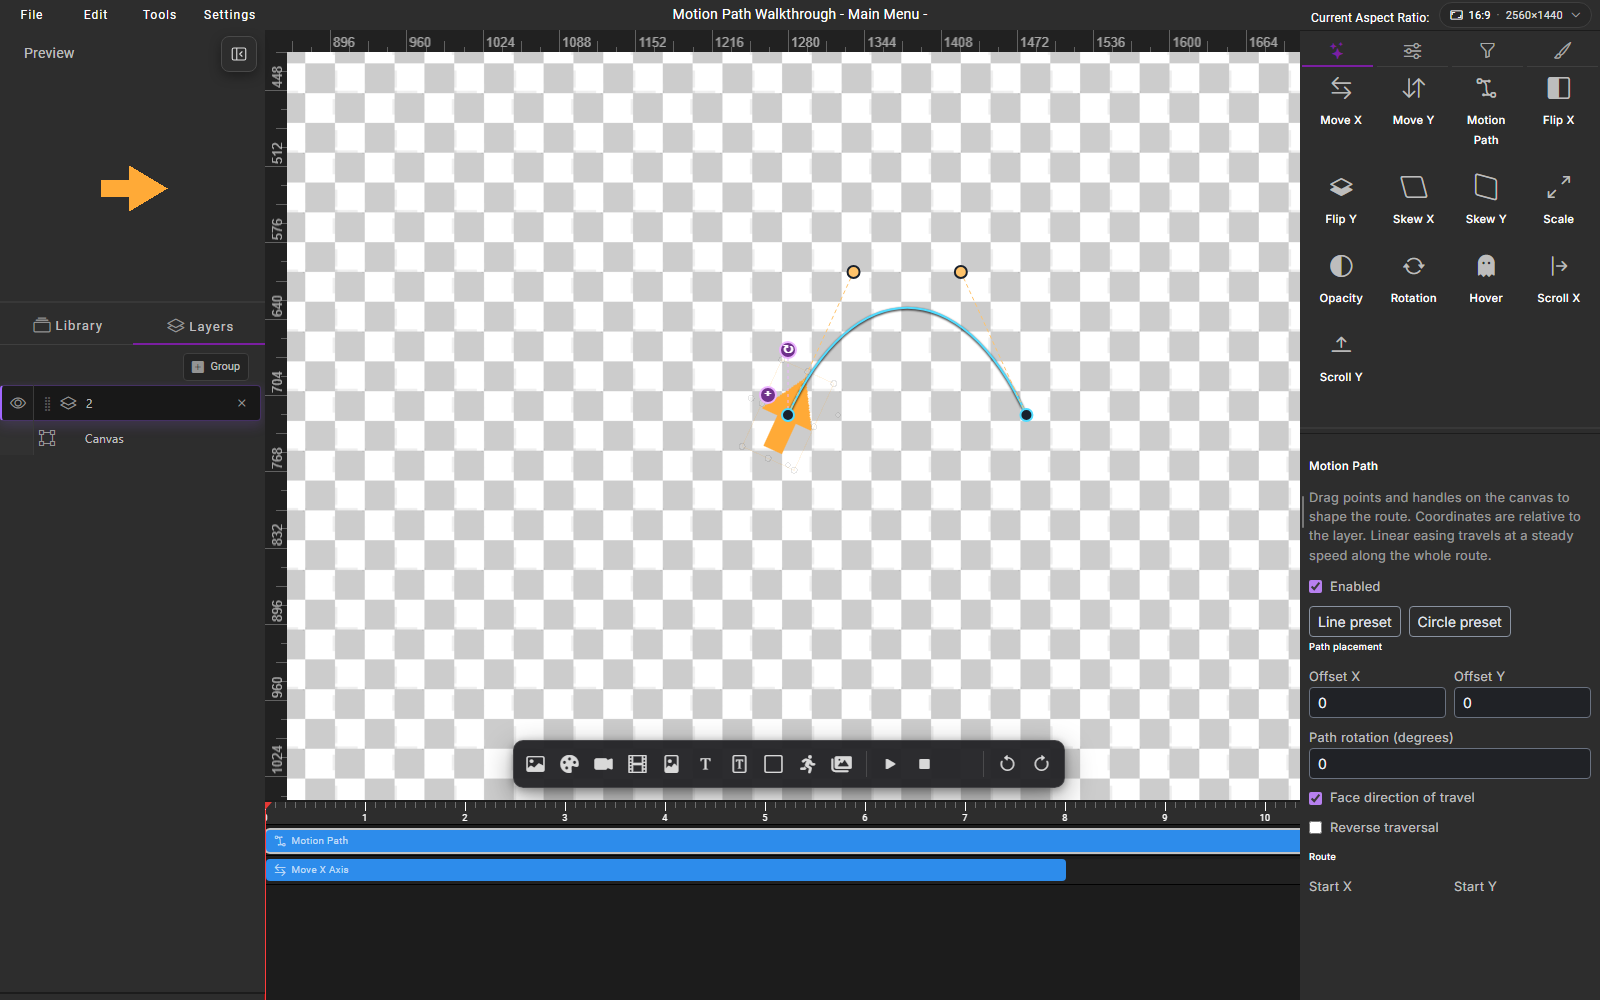
Opacity, scale, and rotation animations also work alongside the route. For a group, the route carries all children. Children retain their local positions, scales, pivots, rotations, and separate animation timing.
6. Save and reopen
- Stop preview.
- Choose File > Save, or press Ctrl+S.
- Wait for saving to finish.
- Reopen the project and select the same layer and Motion Path bar.
- Check the route, offsets, facing, and timing, then preview again.
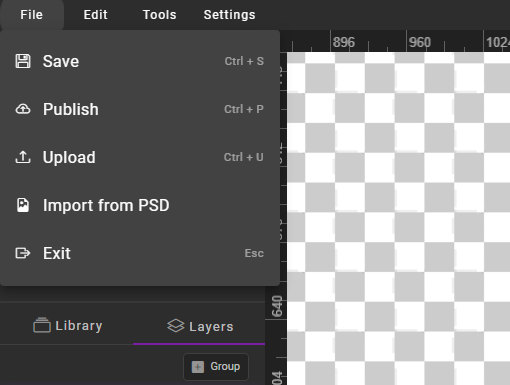
The saved theme includes the route and animation settings. Theme export and import retain these settings through the existing theme workflow. Continue with Publishing when your theme is ready.
Review each aspect ratio you provide. Changing the viewport does not redesign a route for another layout.
Common adjustments
| What you see | What to check |
|---|---|
| No Motion Path in the animation browser | Use a Builder version containing the update linked above. Select an image, video, or group layer. |
| No editing guides | Pause or stop preview, select the layer, then select its Motion Path timeline bar. |
| Artwork stays still | Enable the animation and give the route some length. Check the delay and timeline position. |
| Artwork jumps at each repeat | Close the route, or enable Loop and Yoyo for back-and-forth movement. |
| Artwork turns sharply at a join | Align the adjacent curve handles, or disable Face direction of travel. |
| Route starts away from the placed layer | Check Start X/Y and Offset X/Y. |
| An edit misses your target | Use Edit > Undo. Use Edit > Redo to restore the change. |
Create and edit routes with the Builder controls. The HyperTheme Assistant reads existing route details but does not create or edit Motion Paths.